This is a Part 1 of a simple tutorial for using a Community Dashboard Editor (CDE) form in the Pentaho BA server to end data and pass it to a Pentaho transformation for storage/processing. See Part 2 for building the back-end handler
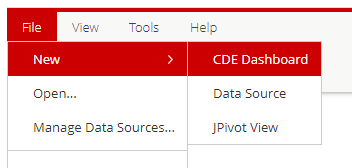
First create a New CDE Dashboard
Then, on the Layout Panel (the first panel) add one row and 4 columns

Select each column in turn, and in the right hand panel, name them panel1, panel2, panel3 and panelbutton. In the right-hand panel, set the ‘Height’ to 50.
Switch to the Components Panel

and add 3 textbox inputs and a button. On the right of the page name them box1,box2, box3 and savebutton. On ‘savebutton’ set the value for ‘Label’ to “Save”.

In the ‘HtmlObject’ box, put ‘panel1’ for box1, ‘panel2’ for box2, ‘panel3’ for box3 and ‘panelbutton’ for savebutton. This assigns the HTML textbox and button elements that will be created to the ‘div’ elements that will be created by the ‘Layout’ panels.
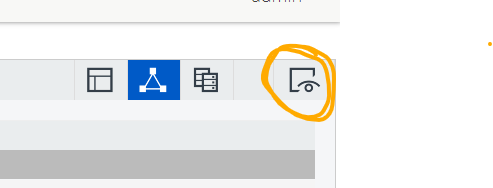
Click the save button at the top left and save the form in your ‘Home’ directory as ‘submit_demo’ In the top right corner, click the ‘eye’ icon to get a preview.
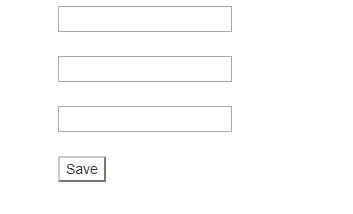
You should see something like this.
Close the preview, and on the ‘Components’ panel, choose the ‘savebutton’ button component and in the right panel, click ‘Advanced Properties’ towards the bottom click the little button to show the ‘PostExecution’ editor. ‘Post Execution’ occurs after the component is created and any setup done . Normally, you’d want a ‘Click’ handler on a button, but this component doesn’t have it.

What we will do instead is use the ‘PostExecution’ handler to attach a ‘Click’ handler to the button, so that when it is clicked, it goes off and does something.
Enter the following code which uses jQuery to find the element just created and telling it on ‘click’ to go to the function ‘SaveTheSession’. It’s been stuck inside a setTimeout to stop the waiting for the server response from locking the GUI
function f() {//add the click function to be listened to$('#' + this.htmlObject + ' button:first-child').click(function f2(e){ window.setTimeout( SaveTheSession,100);});}
and click ok.
Move back to the Layout panel and add in a code component. Call it ‘code’ in the righthand panel and then open the ‘resource code’ editor

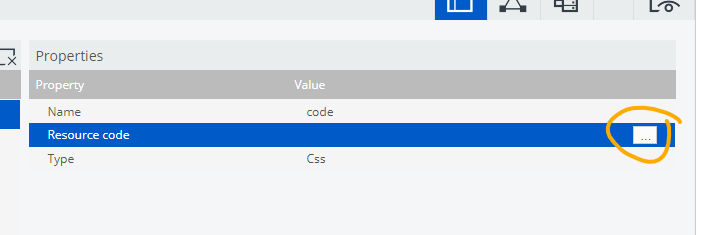
In the editor add the following code. One proviso is,that if your repository is a file- type, the filename to use is '/public/load_demo' but if you are using the database repository (the standard one) you use '/public/load_demo.ktr'
function SaveTheSession() { // Set up some metadata
var svr = document.location.origin; //the name of the servervar api = '/pentaho/kettle/executeTrans/'; //the apid callvar rep = 'singleDiServerInstance'; //this is the default name. May be set differently. Check {server}/pentaho/kettle/status for the name (at the bottom) var trans = ('/public/load_demo.ktr');uri_string = svr + api;//build a submit objectvar jsonSubmit = {}; //an empty hash to hold the submission//get the values in the boxesvar varbox1= $("#render_box1").val(); //the name we gave the component has been appended to 'render_' and is now the 'id' of the element that we can use to get it's valuevar varbox2= $("#render_box2").val();var varbox3= $("#render_box3").val();var P_SUBMIT = {}; //an empty hash to which we'll add attributes and put our values into themvar varbox1= $("#render_box1").val(); //the name we gave the component has been appended to 'render_' and is now the 'id' of the element that we can use to get it's value
var varbox2= $(“#render_box2”).val();
var varbox3= $(“#render_box3”).val();
var P_SUBMIT = {}; //an empty hash to which we’ll add attributes and put our values into them
P_SUBMIT.box1= varbox1;
P_SUBMIT.box2= varbox2;
P_SUBMIT.box3= varbox3;//submission timevar currentTime = new Date().toLocaleString();P_SUBMIT.submissionTime = currentTime.replace(/[\/:, ]/gi, "_");
//stringify the data object (turn it into JSON) and assign it to the Submit objectjsonSubmit.P_SUBMIT = JSON.stringify(P_SUBMIT);jsonSubmit.rep = rep;jsonSubmit.trans = trans;
console.log( JSON.stringify(jsonSubmit)); //log to the javascript console (see Dev Tools)//use a JQUERY$.ajax({url: uri_string,type: "POST",data: $.param(jsonSubmit),beforeSend:function(){
alert(‘submitted’)},complete:function(){toggleSpinner('busy','off');},success: function f(data, textStatus, jqXHR) {alert(data);},error: function f(jqXHR, textStatus, errorThrown) {alert(textStatus + ": " + errorThrown);}}); }
Click OK and run the ‘Preview’ of the form. Enter some data and click the ‘Save’ button
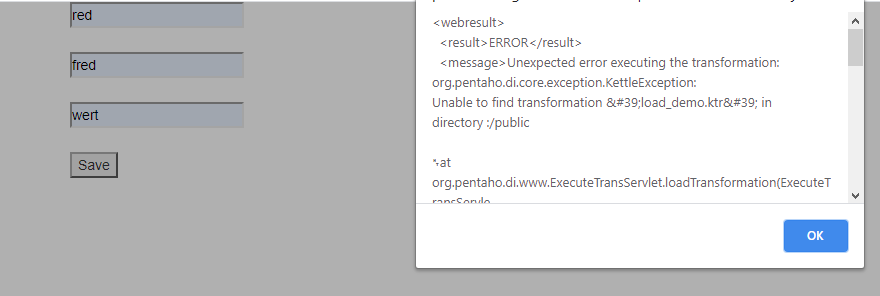
It’s thrown an Error because we haven’t defined the Pentaho transformation that’s going to receive the information.
We’ll build that in Part 2 of this tutorial.